Write your K6 script using Javascript
For Run:-
k6 run file_name.js
Create a YAML File in below path
.github/workflows
The YAML File look like
name: add_the_workflow_name

on:
  workflow_dispatch: # used for manual trigger
    inputs: # taking user input
      note:
       description: 'The number of iterations should not be less than the number of VUs' # information of this filed
       required: false
       default: 'Leave this field as it is'
      JSFileName:
       description: 'One Sanity File Name not the Extn at once but case sensitive' # any message
       required: true
       default: 'file_name'
      iterations:
       description: 'How many iterations(Positive Integers)'
       required: true
       default: '1'
      duration:
       description: 'How many durations(Positive Integers h/m/s)'
       required: true
       default: '100m'
      vus:
       description: 'How many virtual users(Positive Integers)'
       required: false
       default: '1'

jobs:
  build:
    name: Run k6 Generic by manual trigger
    runs-on: ubuntu-latest # which system
    steps:
      - name: Checkout
        uses: actions/checkout@v2 # using checkout action from github marketplace
      - name: Run k6 local test # either local or cloud
        uses: k6io/action@v0.1 # using k6 action from github marketplace
        with:
          filename:  ./path_based_on_the_project_structure/${{ github.event.inputs.JSFileName }}.js
          # flags: --iterations 1 --duration 100m # static input
          flags: --iterations ${{ github.event.inputs.iterations }} --duration ${{ github.event.inputs.duration }} --vus ${{ github.event.inputs.vus }} # dynamic input
Add above things in the main branch then click on the Action

then Click on the workflow you will get this image below
![]()
Click on the Run workflow you will get a this image below
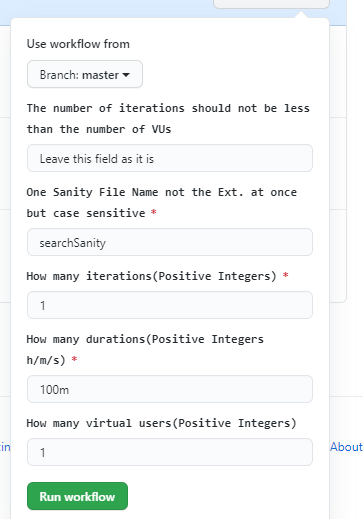
You can run with this values or you can change and hit on the run workflow button
Conclusion
We hope you guys have learned by reading this article.
Let us know if you have come across any other scenarios where you have found a better way to effectively implement this method. Also, if you have any questions, feel free to reach out to us via the comment section below.
![]() Happy Testing
Happy Testing ![]()